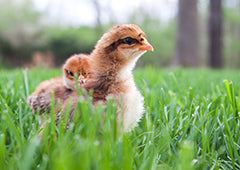
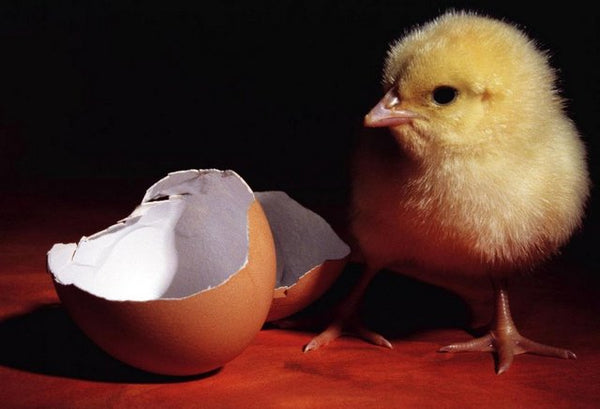
There is nothing more spectacular than the miracle of birth! Chicken incubating is egg-straordinarily spectacular! Hatching chicken eggs is an amazing process-in just twenty-one days, chicks pip through the shells and emerge, a bit damp and wearied from their endeavour, but within just a few hours, they will be dry, fuzzy and ready to join their hatch-mates in the brooder.
While chicken incubating is egg-citing, it can stir up apprehension. The future of fragile life is in your hands. Don’t let fear prevent you from embarking on this beautiful experience though. Just be prepared- chicken incubating is a complex process in which a multitude of factors come into play, so not all of your fertilized eggs will hatch. In fact, during the chicken incubating process, only about eighty-five percent will hatch. While those are not bad odds, there is a good possibility that you will experience a loss. That being said, let’s learn about the amazing journey of chicken incubating-from fertilized egg to fuzzy peep!
First things first-eggs! Where can you obtain fertilized eggs for the chicken incubating process? There are three possibilities-from your own flock, from a friend or neighbor’s flock, or from a hatchery/mail order. The best most viable choice, of course, is selecting eggs from your own flock. You know your flock. And, you’ll be able to choose the freshest eggs. The next best choice is to get eggs from someone you know. Or, if either of these is not an option, because at-home chicken incubating is becoming more common, there are many hatcheries and mail order options. Just google “hatching eggs” and voila…eggs!
THE PROCESS OF CHICKEN INCUBATING
Egg Selection: (When using eggs from your own or a friend’s flock)
A vital component to chicken incubating is to select clean eggs that are nicely shaped and not too round, too long, or misshapen in any way. The shell should be void of roughness or cracks. If you must use soiled eggs, clean them gently with fine sandpaper or sanitize them with a mixture of bleach and water. Measure out 5 ml bleach and mix into 1L of water that is approximately 38 degrees C. Hold eggs in the mixture for 1-3 minutes, then let them air dry. You can store collected eggs, large end down, in cartons for up to six days in a cool(10-15 degrees C) dry place(not in the refrigerator!) without harming hatchability, until you have the number of eggs you’d like to hatch. Okay, so now you have your precious fertilized eggs! Let the chicken incubating begin!
Placing Eggs into the Incubator and Turning
Hatchability, during incubation, is directly affected by the positioning of eggs in the incubator. Always, always, always place eggs into the incubator with the larger end higher than the pointy end and for the duration of the chicken incubating period. For those of you who have the benefit of an incubator with an auto turning device then you needn’t worry about turning the eggs. If you will be manually turning your eggs during chicken incubating, mark your eggs with an X on one side and an O on the other side with a pencil. A good rule of thumb in chicken incubating is to turn your eggs first thing in the morning, at midday, and again at bedtime by carefully rolling them a half turn from X to O or vice versa. Unfortunately, when opening the incubator for turning, some very vital humidity is lost. You can make up for this loss by spraying your eggs with tepid water. Stop turning eggs on day nineteen (seventeen for bantam eggs), when chicks will begin to pip, or peck at the shell with their egg tooth-a tiny pointy part at the end of its upper beak.
Candling and Culling
During the process of chicken incubating, it’s a good idea to cull eggs that are no longer viable because they’re just not fertile or hold already dead embryos. By removing these eggs, you eliminate possible contamination to your chicken incubating process, from rotting eggs. Candling is simply shining a bright light behind the egg and observing the contents. Candle eggs on day seven. Look for a network of blood vessels encompassing a dark spot-this egg is developing correctly. If you see nothing, a thin bloody looking ring, or cloudy contents, the egg is no longer viable and should be culled. Candle again prior to stopping turning. This time look for a darkness inside the air cell (the air cell of an egg is the space directly inside the eggshell which grows larger as incubation progresses) and possible movement which indicates that all is well with the chicken incubating process.
Stop Turning Eggs and Pipping
It’s day nineteen, hatch day is rapidly approaching, and this adventure of chicken incubating is getting truly egg-citing! Stop turning eggs! Any minute now, pipping will begin! Typically, pipping starts three days prior to hatch day. During stage one, the embryo is not able to access adequate oxygen anymore, so it pips into the air cell for help. Stage two requires a bit more effort from the little embryo. Oxygen from the air cell helps it to muster up enough strength to pip through the shell, pip an opening almost all the way around, and finally, to push its new egg-straordinary chick body out! Hatching generally takes a whole day to complete the process. Is it any wonder? Oh, the marvels of chicken incubating!
Cleaning Up from Chicken Incubating
Ah, the little peeps have moved into their brooder and are happily peeping and thriving in their warm cozy new digs. Chicken incubating is complete. So, it’s clean up time. ASAP following hatching, take away any eggs that failed to hatch, unplug the machine, gently clean all surfaces with a clean soft paintbrush, then wash with warm water and soap excluding electrical parts. Let air dry, then sanitize with apple cider vinegar by mixing about 15ml ACV with water in a spray bottle. Let air dry again, then wipe with a cloth dipped in warm water. When completely dry, box it up until you’re ready to begin the egg-citing process of chicken incubating again!
There is so much to learn about bringing new life into the world. With the right knowledge and advice, it can be a joyful and eggstraordinary experience for the whole family. Nothing compares to seeing fluffy little hatchlings peck out of their shells. Getting to this perfect moment does come with a fair few challenges and risks which can be stressful and overwhelming, especially without the right information.
This is why I recommend our friends at Chickenpedia to all of my readers. They have created the brilliant Hatch A Plan course to help you successfully incubate and hatch happy and healthy chicks. Their course offers valuable advice to ensure you build your knowledge to avoid tragic disasters, as these little ones can be so sensitive to temperature! You can learn about the conditions and equipment needed to confidently bring new life into the world.
As chicken keepers, we want to do an eggcellent job when caring for our feathered friends. Many chicken keepers struggle to handle chicken health or behaviour issues, especially in the first few years of having a flock. Chickenpedia have comprehensive online courses on everything you didn’t know you need to know and then some more! From raising baby chicks to feeding and behavior, you’ll find beginner-friendly courses that’ll give you the expertise and confidence to successfully look after your chickens for years to come.
These courses are exclusive to members only, so flock to Chickenpedia today!

