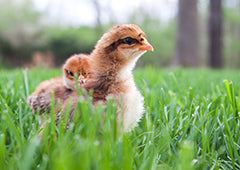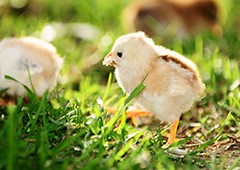

Raising baby chickens is one of the most rewarding experiences you could ever have as a chicken keeper. Honestly, who doesn’t love the idea of raising your own flock from babies! When it comes to baby chickens, there are two different ways you can embark on hatching and raising - yourself with an incubator, or using a broody hen to hatch and raise them naturally.
Both methods of raising baby chicks have different levels of involvement - it just depends on how hands on you want to get, and whether you’d like to take on the mothering role yourself, or leave the mothering up to your clucky chook!
What is involved with raising baby chickens in an incubator?
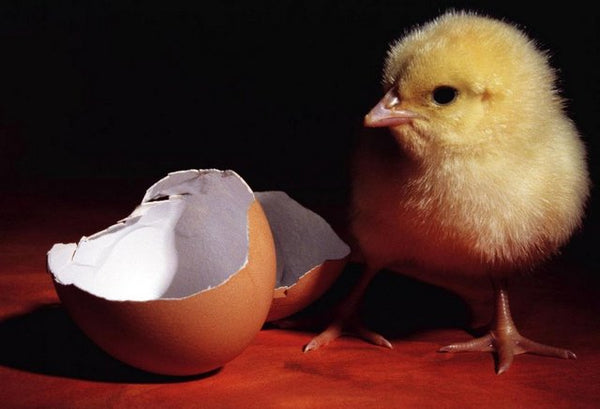
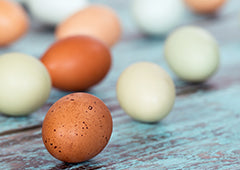
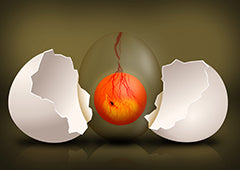
If you want to get hands on with your hatch and raise the baby chickens yourself, then hatching in an incubator is definitely your best option. An incubator hatch involves placing fertile eggs in an incubator (a small box-like machine that regulates temperature and humidity), and monitoring them for approximately 21 days until your beautiful baby chickens hatch!
Whilst the incubator generally does most of the work by regulating the heat and humidity, and also turning the eggs three times a day (essential so the embryo doesn’t stick to the shell), there are still things that you as a prospective mother hen will need to do to ensure the hatch goes smoothly!

Warm up the incubator and monitor the temperature and humidity
It’s a great idea to plug in the incubator around 24 hours before you plan to put fertile eggs in. This is so the incubator can warm up to the correct temperature and humidity levels- it may require a bit of fiddling and back and forths to get it juuust right (and also so you can see if there’s any issues with the machine before it really matters!)
Ensuring the incubator is at the right temperature and humidity is one of the most crucial steps to a successful hatch. Incubator’s are generally pretty efficient at keeping the right levels, however machines can only do so much! If the incubator goes out of range dramatically, the incubator should sound an alarm - in which case, you’ll need to step in and adjust the temperature and humidity so it returns to the required level.
It’s very easy - here’s how to adjust the levels:
To adjust temperature:
Too cold: Most incubators can be adjusted by simply pushing the + sign on the incubator
Too hot:
Push the - sign down on the incubator
To adjust the humidity:
Too high:Open the incubator lid for a few seconds, or until you see the humidity level dropping
Too low: Squirt some water into the incubator - there should be a small opening to do so- be careful not to overdo it, as it will take some time to rise to the correct level
Keep an eye on the incubator throughout the 21 days, and the temp and humidity should be on track!
Candling the eggs
The second task you’ll need to do is hands on, and heaps of fun too! During the 21 days of incubation, you’ll need to candle the eggs three times on days 4, 10 and 17. Some people might be tempted to candle more (it is a little addictive), but three times is plenty.
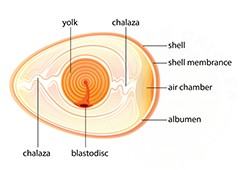
Candling involves shining a bright light onto one end of the egg, which illuminates the contents and lets us see how the embryos are developing. It’s best done in a dark room for maximum visibility. Have a peck here for more info.

Here’s what you should look out for when candling:
DAY 4 CANDLING
-
If the embryo is healthy, you should be able to see a dark spot around the middle of the egg, with thin tree-branch like veins sticking out around it.
-
If the embryo hasn’t survived, (which is unfortunately sometimes the case through no fault of your own), you will see a red ‘blood’ ring around the egg. You should remove the egg from the incubator immediately if you see this as it can sometimes spoil the other eggs.
-
If the egg is clear and you can’t see anything at all, this means the egg was infertile, or was too old before incubating to be able to develop.
DAY 10 CANDLING
-
By this stage you should definitely be able to see a large, dark spot where the embryo has developed, as well as the veins spindling out from it.
-
Again, if you can see spots or rings of blood, the embryo has not survived – so remove the egg from the incubator as quickly as possible.
DAY 17 CANDLING
-
Embryo growth is virtually near completion, with the beak, feathers and claws having developed. Most of the egg will appear dark, however you should still be able to identify veins and the yolk.
-
Any blood rings or foul smells means you should remove the egg.
Find more information about candling in this article. If you’re hatching baby chickens with an incubator, that’s about all you need to do until hatching day arrives!
What’s involved with raising baby chickens with a hen?
Want to hatch your baby chickens naturally using a hen? It’s a little less hands on, as the hen does most of the hard yards, but you still need to monitor the mother hen’s progress in case things go awry.
Find a broody hen
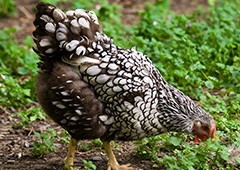
The first thing you’ll need to do is to find a broody hen! Some breeds like the Silkie have a natural tendency for broodiness, others will need a little encouragement. A good way to encourage broodiness in your hen is to leave eggs in the nesting box (or put a few fake wooden ones in) - once a clutch has built up, you’ll find the hen will naturally start displaying broody behaviour, and is ready to take on some eggs of her own!
Look after the hen while she’s incubating
A broody hen will need a little egg-stra love and care while she’s incubating her baby chickens. This is because broody hens neglect their own needs when they’re looking after the growing babies! They’ll eat and drink dramatically less than normal, and also consume less - so make sure the hen has fresh water and food available nearby at all times. Fresh straw in the nesting box and a quiet, dark coop (she’ll need separate quarters to the rest of the chickens) will keep her comfortable and healthy throughout the incubation process!

Have an incubator and a brooder on standby
Sometimes, for whatever reason, a hen will abandon her baby chickens - whether they’re still in embryo form, or have hatched. This can happen at any stage of the incubation, she may simply refuse to keep sitting on them or reject the baby chickens… a harsh reality of natural incubation! In this scenario, you’ll need to have an incubator (if the chickens haven’t hatched yet) or a brooder (if the baby chickens are less than six weeks old) at the ready so you can continue raising the baby chickens yourself.
When it comes to turning the eggs and teaching the little hatched baby chickens how to eat and drink, an attentive mother hen will take care of all that for you!
However you want to raise your baby chickens, it’s an incredibly rewarding experience - whether you’re getting hands on hatching yourself with an incubator, or you're letting a mother hen look after the incubation, you’re sure to become a hatch-a-holic in no time!
Check out our Baby Chickens category in our Learning Centre to find out more brilliant information about hatching and raising baby chickens!
Whether you decide to go with Chicken or Machine, there is so much to learn and prepare before helping to bring new life into the world. It can be a joyful and eggstraordinary experience for the whole family. Nothing compares to seeing fluffy little hatchlings peck out of their shells. Getting to this perfect moment does come with a fair few challenges and risks which can be stressful and overwhelming, especially without the right information.
This is why I recommend our friends at Chickenpedia. They have created the brilliant Hatch A Plan course to help you successfully incubate and hatch happy and healthy chicks. Their course offers valuable advice to ensure you build your knowledge to avoid tragic disasters, as these little ones can be so sensitive to temperature! You can learn about the conditions and equipment needed to confidently bring new life into the world.
We all know just how quickly these little ones grow up so you are going to want to make sure that you've got the knowledge you need to raise a happy, healthy flock. You wouldn't want to risk making tragic mistakes that could impact their development, growth or worse! 67% of chicken keepers surveyed experienced a chicken health or behaviour issue in the first 12 months that they didn’t know how to handle.
Cluckily, Chickenpedia also has a Raising Baby Chicks course that provides lots of useful information to help you avoid any life-threatening accident. You'll have new confidence to give your feathered friends the best start in life.
From raising baby chicks to feeding and behavior, you’ll find beginner-friendly courses that’ll give you the knowledge and confidence to successfully look after your chickens for years to come. Chickenpedia's courses are exclusive to members only, so get access today!